(from doorway, looking to the left)
(from doorway, looking to the right)
This room has been a long time in the making. I first found the PBK quilt that I used as my inspiration (see further down) while Mr S was deployed two years ago. Ever since then I've been diligently looking for fabrics and accessories to use in LMS's room when we moved into our own place. A lot of the fabric I used is from the pottery barn reject store (aka Downeast Outfitters Outlet store), and are sheets, pillowcases, and a headboard cover that I got for a couple bucks each. Ebay and craigslist were the sources for several of the more pricey items. Because I collected things over such a long period of time, I don't know the total that I spent, but it wasn't a lot. And spreading out the purchases helped the budget.
I bought these cute prints on ebay and the frames are from wally world and I painted them to match the room better. (and yes, they're not hung quite straight. oh well.)
I found the log bed on craigslist about a year and a half ago. It was an awesome price, and the people actually lived only a mile away, so I bought it and we stored it till we moved here and had room to set it up.
We rent, so I couldn't paint, but I had promised LMS a 'purple room'. I used liquid starch and staples (the sheet was too heavy to stay up by itself while it dried) to adhere a sheet from the outlet store to the wall. The sheet dried to the wall, and it should come down without any problems when the time comes (that's what everyone says, anyway). I used the leftover fabric and some small white ric rac to make a ruffle to cover the uneven edges. Probably overkill, and it took quite a while to make 20 feet of ruffle, but I like the look.
(better view of the prints)
Embroidery hoop wall art: I bought a lot of 20 various-sized hoops for a ridiculously low price on ebay and the fabric is sheets and pillowcases from the outlet store, a sheer curtain with butterflies bought for super cheap on ebay, and leftover fabric from the ottoman.
I recently found a gently used light green PBK chamois sheet on ebay. LMS is really big on "snuggly" fabrics, so she really likes it. Pillows: the square one I found at the outlet store for a buck, the lavendar pillowcase behind that I made from a chamois stroller blanket I found at the outlet store for a buck, and I also found the gingham pillowcase behind it at the outlet store for a buck. The larger lavendar pillows were originally covers I made for cushions for our first bike trailer (it was hard plastic) but they work well on LMS's bed. She likes lots of pillows to prop up on and play with :)
The strip of lavendar on the right side of the bed is actually a bolster I made from a body pillow. There's a 6 inch space between the mattress and the wall, and I had crammed two body pillows in the space, but they didn't match and were really a bit big for the space. I used fabric from the headboard cover I found at the outlet store to make a rectangular bolster filled with the innards of one of the body pillows. It fits just right and looks much better than the old setup.
The dust ruffle I made from leftover fabric from the chair. The bed is quite high off the floor, so a store-bought dust ruffle wouldn't work. I sewed velcro to the top of the panels and stapled the other side of the velcro to the back side of the logs. Easy up, easy down.
There's a couple canvas bins in her room- a large green polka dot one for her stuffed animals and a large lavender polka dot one in the closet that we use for a dirty clothes hamper. I got them from the outlet store for $5-7 a piece I think. I did have to pick out some embroidery, but since it was only on one side it's not very noticeable.
The purple stepstool is an old one that I painted to match the room.
The ottoman I found for super cheap at the thrift store, I already had the foam and batting and I bought fabric on sale at JoAnns (details
here).
I scored an awesome deal on ebay on the rug (it's a PBK rug). I really should have gotten a smaller one, but this was literally the cheapest one, and it works fine. Though I will say it was quite a workout to get in place, since it had to go under the dresser and the bed. I moved the dresser out of the way, but her bed weighs a ton, and I could only lift it half an inch or so. Try doing that while shoving a non-rigid rug under the leg of the bed with your foot. It would definitely have been easier with two people.

The whole room is based around this Pottery Barn Kids quilt that I first saw a couple years ago and loved. After much patience, I found the quilt and a pillow sham (seen on the reading chair) on ebay for a good price. LMS tosses and turns A LOT, and the side gate prevents a quilt from lying nicely on the bed, so she uses a purple fleece butterfly blanket that I made from fabric I found at wally world. When she gets older we'll move the quilt onto her bed. For now it just hangs on the footboard and looks pretty.
The reading chair that I
reupholstered. I found it on craigslist for $20.
I bought the fabric for the curtains in the bargain basement of an upholstery fabric store. I lined it with a $3 black flat twin sheet from wally world. It blocks light remarkably well, even with the blinds open.
An easy tie holds the curtain back. I tie a cute bow, but LMS just ties it back with half a knot.
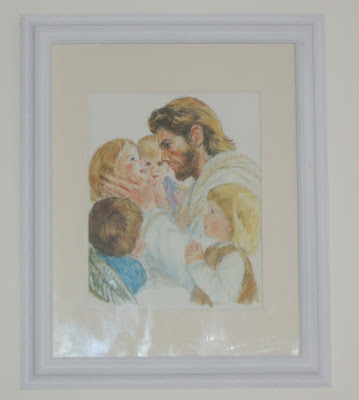
This is one of my depictions of Christ- we had it in our house when I was little. I found this print for a buck or two at a homeschool convention I went to in June, and the frame is another one from wally world that I painted.
View of the wall across from LMS's bed. We bought the dresser brand new at a naked furniture store before LMS was born. It was just the right height to be used as a changing table, and LMS is now tall enough to reach all the drawers.
The name banner is made from fabric from the headboard cover. I painted the backs of chipboard letters and stamped the fabric.
I built the bookshelf after I saw something similar in a catalog... for $70! And it was half the size of the one I built. I already had the wood and paint, so I only needed to buy the dowels and the fabric. My costs ended up being less than $20. I found the purple trash can in the dollar section at Target a year or so ago.
I found a butterfly mobile
here, and loved the idea. All it took was some ribbon, some paper, a butterfly paper punch (found on ebay), a large embroidery hoop, and some fishing line. Kind of time consuming, but I love the result.
LMS's closet is behind the door, and it used to have bifold doors on it. However if the bifold doors were open, they always banged into the room door, and were annoying. They also didn't move very smoothly, and the hinge ended up breaking. So we put the doors in the attic, and a lot of aggravation has been avoided. LMS doesn't like having an open closet, though (it's scary, mommy), so I made a curtain for the closet door out of sheets from the outlet store. It's pretty, it covers the closet, and she's happy.
Final thoughts:
I love photoshop! LMS's room doesn't actually get direct sunshine, which is fine since it's just for sleeping in (if we kept toys in her room LMS would never sleep, it's bad enough having some of her books in her room), but it does make taking pics a little difficult. However, I was able to lighten most of them up using photoshop, and now you can actually see what her room looks like.
I love how her room turned out (and so does she). This is the first room that I've really gotten to decorate. I loved the creative process. After 10 years of feeling like crap and just getting by, I finally have the energy (mentally and physically) to do more. It was very fulfilling to try different things and sew and paint and put it all together. It took longer than I expected it would (all my projects seem to), but it all came together in the end, and it didn't cost an arm and a leg.


.JPG)


